
Energy-Efficient Garage Renovation Upgrades for Calgary Homes
Last Updated: November 3, 2026
Quick Summary
An energy-efficient garage renovation starts by air-sealing leaks at the door perimeter, slab cracks and wall penetrations, then insulating the shared wall, ceiling and garage door. Lighting, ventilation and finishes come after the envelope is sound. Sealing before insulating keeps the insulation working, and a qualified contractor can confirm the right specification for your home.
- Air-seal first: close leaks at the door perimeter, slab cracks and wiring or plumbing penetrations.
- Insulate the shared wall, ceiling beneath living space, and garage door, in that order for attached garages.
- Insulating before sealing air leaks can trap moisture and lead to rot or mould.
- Confirm vapour control and ventilation so sealed spaces do not trap moisture or fumes.
- Install finishes like flooring and cabinetry only after the space is dry, sealed and comfortable.
Table of Contents
- Garage Insulation: Walls, Ceiling and Garage Door
- Garage Air Sealing: Cracks, Gaps and Weatherstripping
- Energy-Efficient Garage Lighting and Windows
- Garage Ventilation, Moisture and Indoor Air Quality
- Upgrade Sequencing, Costs and Payback Periods
- Booking Your Garage Design Consultation With Lux Garages
- Frequently Asked Questions
Many Calgary homeowners treat the garage as an afterthought, yet an attached garage often shares walls, ceilings and an interior door with the living space. At Lux Garages, we design garage renovation upgrades that improve the building envelope, lighting and the protection of vehicles and equipment stored inside.
A garage is a shell that is often poorly insulated and rarely sealed. Heat escapes through an uninsulated garage door, drafts enter through cracks at the perimeter, and the house on the other side of the wall works harder to stay comfortable.
Lux Garages builds each project around the homeowner’s priorities, with the design and build services planned together.
Garage Insulation: Walls, Ceiling and Garage Door
Insulation is a key part of a well-performing garage. The three surfaces that matter are the walls between the garage and the house, the ceiling beneath any heated living space, and the garage door itself.
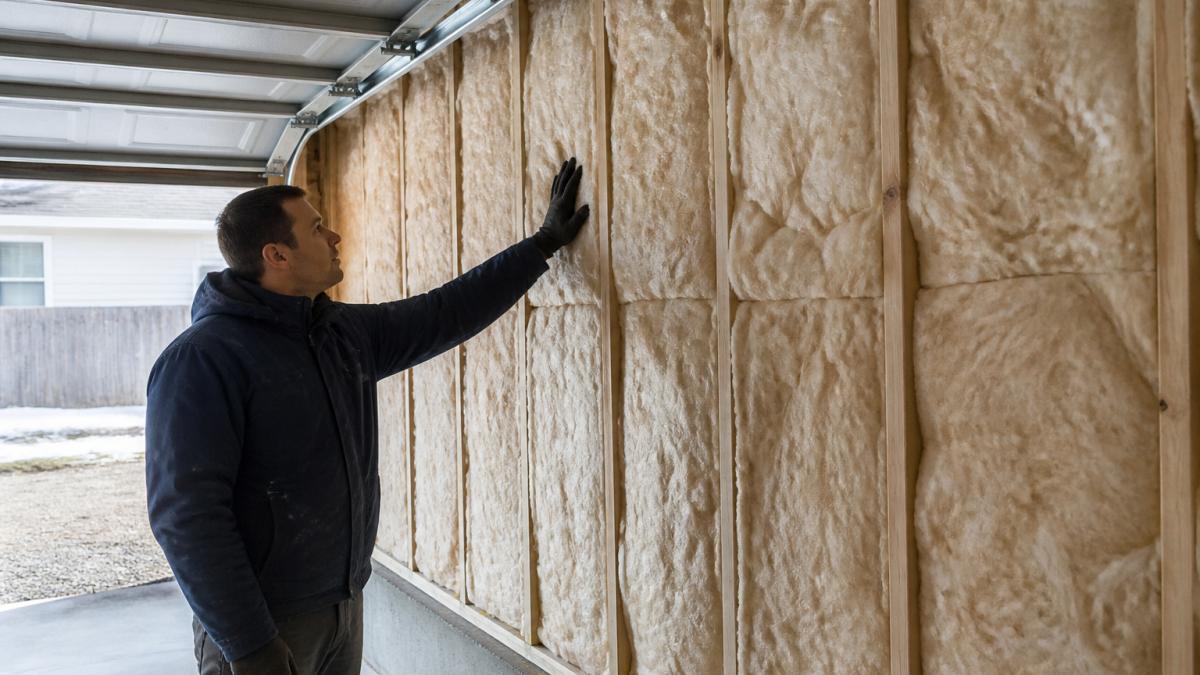
Start by identifying which surfaces are actually part of the building envelope. In an attached garage, the shared wall and the ceiling under living space are interior assemblies that must be insulated and air-sealed to the same standard as the house. In a detached garage, every wall, the roof and the slab edge are exterior assemblies, and the priority shifts to the surfaces that face the prevailing winter wind and the most sun.
Walls and ceiling
For the shared wall, the practical approach is to fill the stud cavity completely, then install a continuous rigid insulation layer or a sealed air barrier on the garage side to break thermal bridging through the studs. On the ceiling beneath living space, the same logic applies: cavity insulation plus a continuous layer, with penetrations for wiring, plumbing and ducts sealed before the insulation goes in. Where headroom allows, adding insulation above an existing ceiling is often cheaper than rebuilding the assembly from below.
The garage door
An uninsulated door is usually the largest single heat-loss surface in the garage. Two routes work: replace the door with a factory-insulated model, or retrofit an insulation kit into the existing panels. Whichever route you take, the door’s perimeter weatherstripping and the bottom seal matter as much as the panel insulation, because a well-insulated door with a poor seal still leaks.
R-values and building-code considerations
R-value measures a material’s resistance to heat flow, so a higher number means better insulation, but the number only means something when it describes the whole assembly, not just the batts. Check the current requirements with your local permit office before choosing materials, as insulation levels, vapour control and air-barrier rules can apply to renovated garage space.
A practical way to think about levels: match the shared wall and ceiling to the insulation level of the adjacent house assemblies, and choose a door with an insulating value appropriate to how often the garage is heated or used as workspace. Where the garage will be conditioned, the assembly needs a continuous air barrier and a vapour control strategy appropriate to the assembly, not a vapour barrier slapped on the warm side of every wall regardless of construction. A qualified contractor can confirm the right specification for your home and your climate.
Watch out: adding insulation without first sealing air leaks and confirming where the vapour control layer belongs can trap moisture inside the assembly and lead to rot or mould that costs far more to fix than the insulation saved.
Garage Air Sealing: Cracks, Gaps and Weatherstripping
Air sealing often delivers quick comfort gains. Gaps around the garage door, cracks in the slab and openings where wiring or plumbing passes through the wall let cold air in and warm air out. Weatherstripping along the door perimeter and sealant at penetrations close these leaks.
A common mistake is insulating before sealing. Insulation performs poorly when air moves freely through or around it, so seal the gaps first and then add insulation to the sealed envelope.
Weatherstripping on the interior access door between the garage and the house matters as much as the exterior door. This door is a frequent source of drafts, and a tight, well-fitted unit keeps the garage’s conditions from reaching living spaces.
Energy-Efficient Garage Lighting and Windows
Lighting is one of the simplest upgrades to plan. Lighting and electrical upgrades cover the fixtures and power work involved. LED fixtures use less electricity than older lamps, last longer and produce bright, even light for workbenches, vehicle displays and storage zones. Layering ambient lighting with task lighting over workstations makes the space both efficient and pleasant to use. Explore LED and ambient lighting options to see how these fixtures are designed for garages.
Schedule Your Private Garage Design Consultation →
Windows and daylighting can brighten a garage without adding artificial load during the day. Position new windows with the building’s orientation and privacy in mind, and choose units with good thermal performance so they do not become a new source of heat loss.
Garage Ventilation, Moisture and Indoor Air Quality
An energy-efficient garage must still be ventilated. Sealing a space tightly can trap moisture, exhaust fumes and off-gassing from finishes and stored chemicals. Balanced ventilation and a moisture management plan protect both the structure and the air people breathe when they walk from the garage into the house.
Watch for condensation on cold surfaces, which signals that moisture is building up. Vapour barriers, correct insulation placement and a dedicated exhaust fan address the problem, and heating or cooling equipment should be sized and vented correctly for the space.
Upgrade Sequencing, Costs and Payback Periods
The order of work affects both cost and results, and most guides skip this entirely. Read how to upgrade your garage for an electric vehicle if EV charging is part of your plans. A prioritized plan prevents the common and expensive mistake of installing finishes, cabinetry or flooring before the envelope is sound, work that then has to be removed to fix air sealing or moisture problems underneath.
A sequence that holds up across most projects:
- Assess and air-seal first. Find and close the leaks at the door perimeter, slab cracks, and penetrations for wiring and plumbing. This is the cheapest step per unit of comfort gained.
- Insulate the envelope. Shared wall, ceiling and door, in that order of impact for an attached garage.
- Address moisture and ventilation. Confirm vapour control is correct for the assembly and add dedicated exhaust where fumes or moisture accumulate.
- Upgrade lighting and controls. LEDs, occupancy sensors and task lighting over workbenches.
- Then finishes. Flooring, cabinetry, storage and display work last, once the space is dry, sealed and comfortable.
What drives cost
Costs depend on factors such as garage size, the scope of work and whether the door is replaced or retrofitted. Pricing varies, so request a quote from Lux Garages for current figures in CAD. The variables that move a quote most are: square footage of wall and ceiling to be insulated, whether the existing assembly has to be opened up, whether new circuits are needed for lighting or heating, and whether the door is a retrofit kit or a full replacement.
What drives payback
Energy savings and payback periods depend on your current heating system, local utility rates, how the garage is used, and how much of the garage’s heat loss currently reaches the house. Treat any estimate as a starting point rather than a guarantee, and ask for a review that compares the options against your budget and timeline.
DIY versus professional
Doing some work yourself is reasonable: weatherstripping, a basic LED swap, and simple shelf or storage installation are within reach for most homeowners. Insulation, electrical changes, vapour control and work on the garage-to-house separation are generally best reviewed by a qualified professional. The dividing line is usually whether the work affects the building envelope, the electrical system or the garage-to-home separation, if it touches any of those, get it reviewed.
The article recommends a clear order of work for garage upgrades, with each step’s purpose and typical focus.
| Step | What to do | Focus |
|---|---|---|
| 1. Assess and air-seal first | Close leaks at door perimeter, slab cracks and penetrations | Cheapest comfort gain per dollar |
| 2. Insulate the envelope | Insulate shared wall, ceiling and door | Shared wall, ceiling, then door |
| 3. Address moisture and ventilation | Confirm vapour control; add dedicated exhaust | Where fumes or moisture build up |
| 4. Upgrade lighting and controls | LEDs, occupancy sensors, task lighting | Over workbenches and work zones |
| 5. Then finishes | Flooring, cabinetry, storage, display work | Only once space is dry and sealed |
Booking Your Garage Design Consultation With Lux Garages
An energy-efficient garage renovation works best when insulation, air sealing, lighting and design are planned together. At Lux Garages, we start with a consultation to assess your garage, your priorities and your budget, then recommend a sequence of upgrades that fits your home.
Contact Lux Garages to schedule your private garage design consultation and begin planning a space that is comfortable, efficient and built to last. Start your project by sharing your garage’s details and the changes you have in mind.
Frequently Asked Questions
What are the most effective energy-efficient upgrades for a garage?
Common energy-efficient upgrades for a garage include insulating the garage door and walls, sealing air leaks around the door frame and penetrations, and switching to LED lighting. Costs vary with garage size, materials and the scope of work, so request a quote from Lux Garages for current pricing in CAD.
Does insulating a garage make it more energy efficient?
Yes. An uninsulated garage lets heat escape through the walls, ceiling and door, and it passes that cold or heat into the adjoining living space. Insulating the walls and ceiling, and adding an insulated garage door, slows that transfer and keeps the garage more usable year-round. Check the insulation requirements with your local permit office before choosing materials.
Is it worth sealing air leaks in a garage?
Gaps around the garage door, the garage-to-house door, electrical penetrations and foundation cracks can let cold air in and warm air out, which can cause drafts and affect heating costs. Sealing should be paired with proper ventilation to avoid trapping moisture.
What type of lighting is most energy efficient for a garage?
LED fixtures are a common choice for garage lighting because they use less electricity than many older lamp types. Choose fixtures with a suitable colour temperature for workspaces and consider motion sensors or dimmers to reduce energy use further. Lux Garages can plan lighting layouts as part of a full design and build.
